Dr. Angela Alexander invited me to shadow her for a full day in the IBC research lab. The following is a series of photos I took as I watched her go about her day studying IBC. Dr. Alexander is TRIUMPH postdoctoral fellow in cancer biology. Her work at MD Anderson involving coursework, clinical rotations and research focused on finding new targeted therapies in inflammatory breast cancer based on signaling pathway alterations. If you would like to learn more about her work or have an insider view of a research doctor, you can read more on her personal blog, The Cancer Geek.
Thank you Angela for being so willing and open to share your knowledge with us.
Terry
Working With Cells in the Lab: The Basics
[fusion_builder_container hundred_percent=”yes” overflow=”visible”][fusion_builder_row][fusion_builder_column type=”1_1″ background_position=”left top” background_color=”” border_size=”” border_color=”” border_style=”solid” spacing=”yes” background_image=”” background_repeat=”no-repeat” padding=”” margin_top=”0px” margin_bottom=”0px” class=”” id=”” animation_type=”” animation_speed=”0.3″ animation_direction=”left” hide_on_mobile=”no” center_content=”no” min_height=”none”]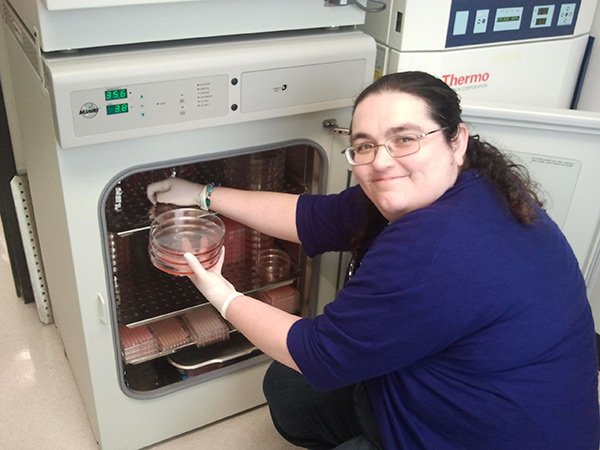 Cells are kept in incubators that keep the temperature and CO2 level constant at 37degrees, 5-10% CO2 to keep cells happy. Inside the incubator there are cells in large and small plates, as well as multiwall plates used for drug treatments. |
[/fusion_builder_column][fusion_builder_column type=”1_1″ background_position=”left top” background_color=”” border_size=”” border_color=”” border_style=”solid” spacing=”yes” background_image=”” background_repeat=”no-repeat” padding=”” margin_top=”0px” margin_bottom=”0px” class=”” id=”” animation_type=”” animation_speed=”0.3″ animation_direction=”left” hide_on_mobile=”no” center_content=”no” min_height=”none”]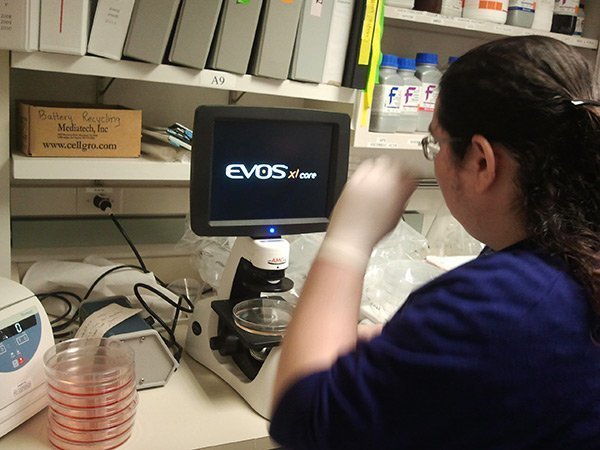 Every day or 2, we check on the health of our cells examining the plates under the microscope. This is our lab’s newest microscope that also has a built-in camera which lets us take pictures of the cells to put in presentations or papers. |
[/fusion_builder_column][fusion_builder_column type=”1_1″ background_position=”left top” background_color=”” border_size=”” border_color=”” border_style=”solid” spacing=”yes” background_image=”” background_repeat=”no-repeat” padding=”” margin_top=”0px” margin_bottom=”0px” class=”” id=”” animation_type=”” animation_speed=”0.3″ animation_direction=”left” hide_on_mobile=”no” center_content=”no” min_height=”none”]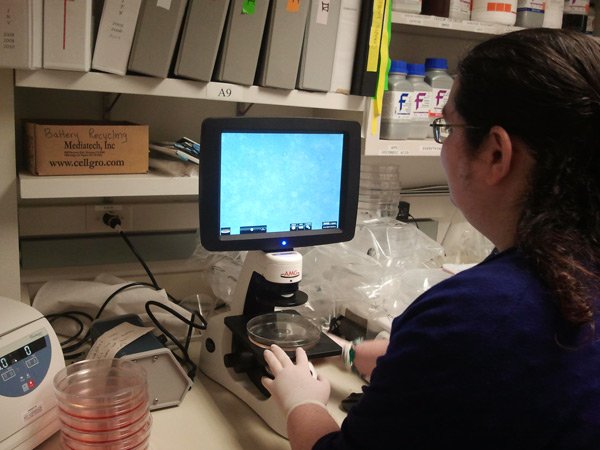 The screen shows us the cells. |
[/fusion_builder_column][fusion_builder_column type=”1_1″ background_position=”left top” background_color=”” border_size=”” border_color=”” border_style=”solid” spacing=”yes” background_image=”” background_repeat=”no-repeat” padding=”” margin_top=”0px” margin_bottom=”0px” class=”” id=”” animation_type=”” animation_speed=”0.3″ animation_direction=”left” hide_on_mobile=”no” center_content=”no” min_height=”none”]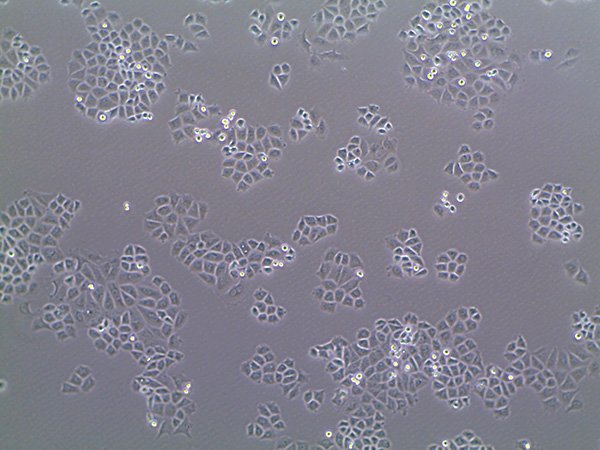 Working With Cells in the Lab: The Basics |
[/fusion_builder_column][fusion_builder_column type=”1_1″ background_position=”left top” background_color=”” border_size=”” border_color=”” border_style=”solid” spacing=”yes” background_image=”” background_repeat=”no-repeat” padding=”” margin_top=”0px” margin_bottom=”0px” class=”” id=”” animation_type=”” animation_speed=”0.3″ animation_direction=”left” hide_on_mobile=”no” center_content=”no” min_height=”none”]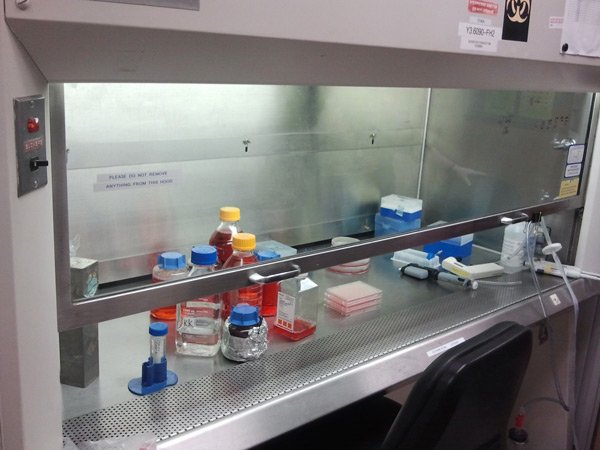 Working with the cells has to be done under sterile conditions, so we perform all the experiments/maintenance in a cell culture “hood”. The airflow pattern is such that the room air is filtered before it can enter around the cells, so that microorganisms are minimized. |
[/fusion_builder_column][fusion_builder_column type=”1_1″ background_position=”left top” background_color=”” border_size=”” border_color=”” border_style=”solid” spacing=”yes” background_image=”” background_repeat=”no-repeat” padding=”” margin_top=”0px” margin_bottom=”0px” class=”” id=”” animation_type=”” animation_speed=”0.3″ animation_direction=”left” hide_on_mobile=”no” center_content=”no” min_height=”none”] One of the most routine cell culture tasks to keep cells alive is feeding them. To feed them, we exchange the liquid media with fresh media every 2-3 days. The picture shows me using a glass pipet to suction off the old media before adding new media. |
Doing a High-Throughput Experiment To Measure Cell Number
[/fusion_builder_column][fusion_builder_column type=”1_1″ background_position=”left top” background_color=”” border_size=”” border_color=”” border_style=”solid” spacing=”yes” background_image=”” background_repeat=”no-repeat” padding=”” margin_top=”0px” margin_bottom=”0px” class=”” id=”” animation_type=”” animation_speed=”0.3″ animation_direction=”left” hide_on_mobile=”no” center_content=”no” min_height=”none”]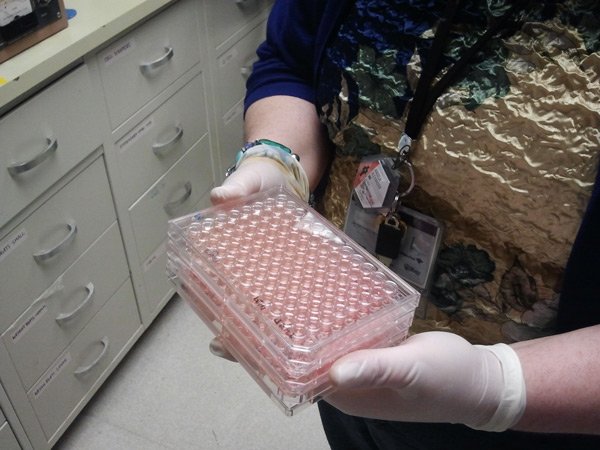 In studying responses to drugs or genetic responses to gene ablation, we often perform cell proliferation experiments in plates like these which have 96 little wells, that we add 1000-5000 cells per well, then add drugs at a variety of concentrations to find the optimal doses for more detailed mechanistic studies. |
[/fusion_builder_column][fusion_builder_column type=”1_1″ background_position=”left top” background_color=”” border_size=”” border_color=”” border_style=”solid” spacing=”yes” background_image=”” background_repeat=”no-repeat” padding=”” margin_top=”0px” margin_bottom=”0px” class=”” id=”” animation_type=”” animation_speed=”0.3″ animation_direction=”left” hide_on_mobile=”no” center_content=”no” min_height=”none”]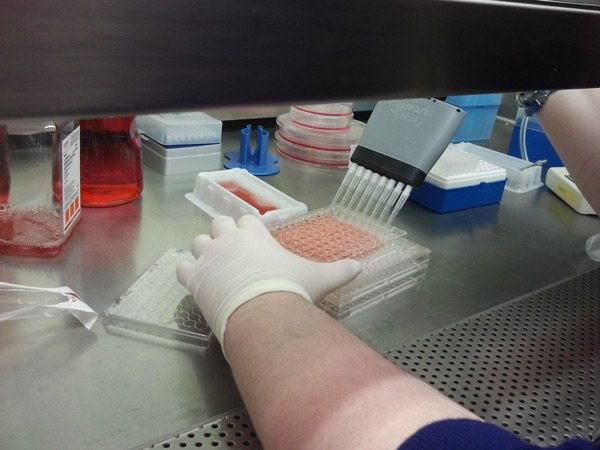 When the drug incubation time has been completed (3+ days usually), the final step in measuring the cell number is to add a chemical called MTT (which we dilute in media) to the cells It is a yellowish powder, that live cells convert to an insoluble purple powder over the course of several hours. Here we are adding the diluted MTT dye then we put the cells back in the incubator for 4 hours to let the live cells make purple! The degree of purple we read later and that tells us how many cells are left over. |
[/fusion_builder_column][fusion_builder_column type=”1_1″ background_position=”left top” background_color=”” border_size=”” border_color=”” border_style=”solid” spacing=”yes” background_image=”” background_repeat=”no-repeat” padding=”” margin_top=”0px” margin_bottom=”0px” class=”” id=”” animation_type=”” animation_speed=”0.3″ animation_direction=”left” hide_on_mobile=”no” center_content=”no” min_height=”none”]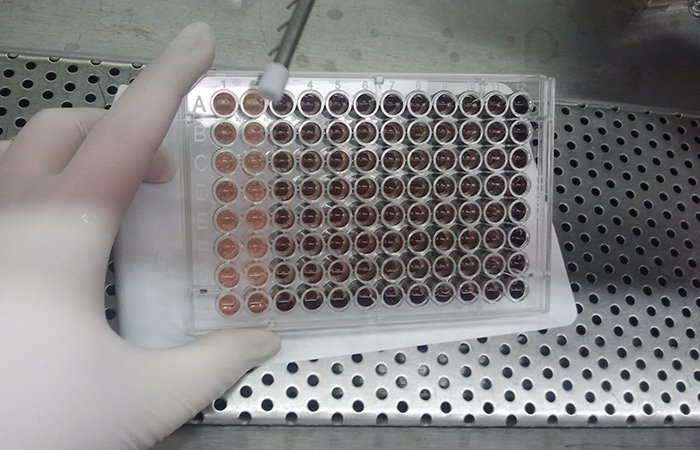 At the end of the experiment you see the wells have some purple (looks more dark red because of the media). Here we use the metal device with prongs (we call it an “aspirator” in the lab, but that’s not its formal name) to such up the media. Then we add a chemical mix to solubilize the purple to make a purple |
Splitting/Plating Cells
[/fusion_builder_column][fusion_builder_column type=”1_1″ background_position=”left top” background_color=”” border_size=”” border_color=”” border_style=”solid” spacing=”yes” background_image=”” background_repeat=”no-repeat” padding=”” margin_top=”0px” margin_bottom=”0px” class=”” id=”” animation_type=”” animation_speed=”0.3″ animation_direction=”left” hide_on_mobile=”no” center_content=”no” min_height=”none”]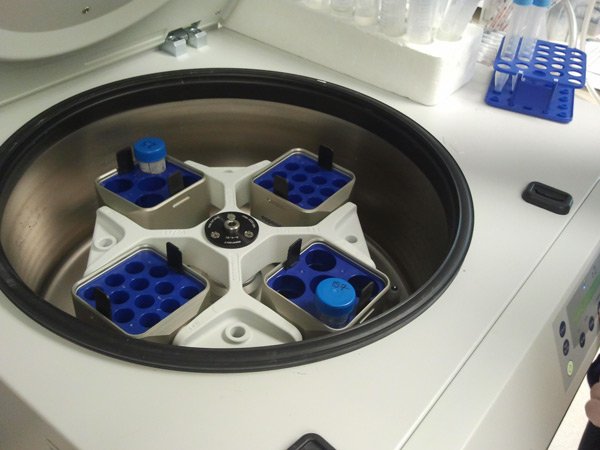 If the cells have spread out to cover 70-80% of the surface of the plate, in order to keep them growing well, we need to detach them and replate in fresh plates at a lower density and/or setup new experiments. If we are just keeping some of them, this is called splitting or passaging them. We detached the cells using an enzyme called trypsin, then we spin down the cells in a conical tube in a big centrifuge to pellet them. |
[/fusion_builder_column][fusion_builder_column type=”1_1″ background_position=”left top” background_color=”” border_size=”” border_color=”” border_style=”solid” spacing=”yes” background_image=”” background_repeat=”no-repeat” padding=”” margin_top=”0px” margin_bottom=”0px” class=”” id=”” animation_type=”” animation_speed=”0.3″ animation_direction=”left” hide_on_mobile=”no” center_content=”no” min_height=”none”]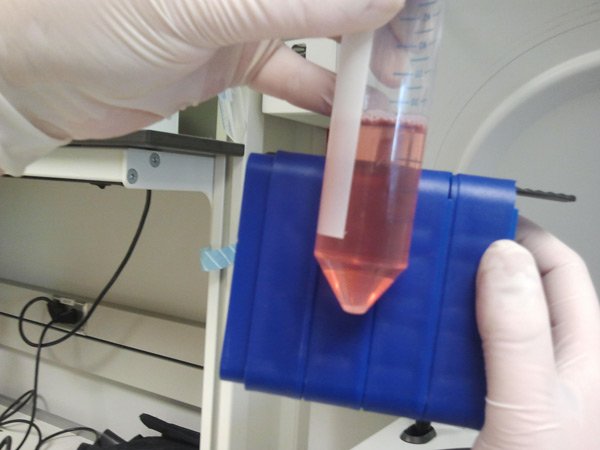 This is the tube after we are finished spinning them – can you see the pellet containing a few million cells? Next we will aspirate (suck off) the media and add some fresh media. |
[/fusion_builder_column][fusion_builder_column type=”1_1″ background_position=”left top” background_color=”” border_size=”” border_color=”” border_style=”solid” spacing=”yes” background_image=”” background_repeat=”no-repeat” padding=”” margin_top=”0px” margin_bottom=”0px” class=”” id=”” animation_type=”” animation_speed=”0.3″ animation_direction=”left” hide_on_mobile=”no” center_content=”no” min_height=”none”]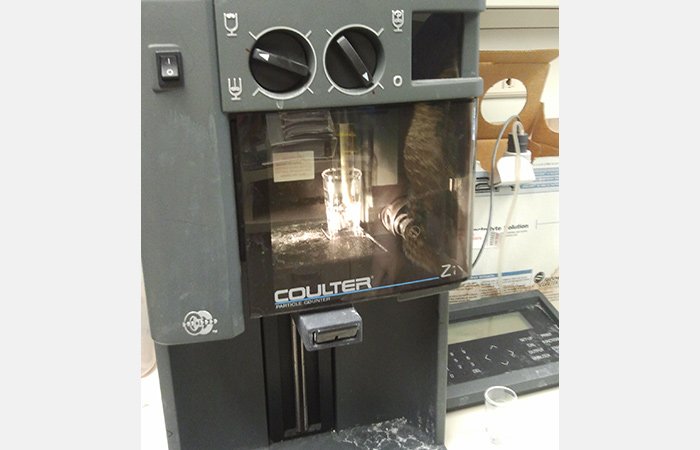 It turns out we were using these cells to setup a new experiment, so we counted them using a small portion of them in this cell counter (that costs ~$10-15K). That way we can start out with equal cell numbers in the control and drug treated plates. We will also plate a small portion of them just to maintain for future experiments in the next 3-4 weeks. |
Determining DNA Content of Cells Using Flow Cytometry
|
[/fusion_builder_column][fusion_builder_column type=”1_1″ background_position=”left top” background_color=”” border_size=”” border_color=”” border_style=”solid” spacing=”yes” background_image=”” background_repeat=”no-repeat” padding=”” margin_top=”0px” margin_bottom=”0px” class=”” id=”” animation_type=”” animation_speed=”0.3″ animation_direction=”left” hide_on_mobile=”no” center_content=”no” min_height=”none”] 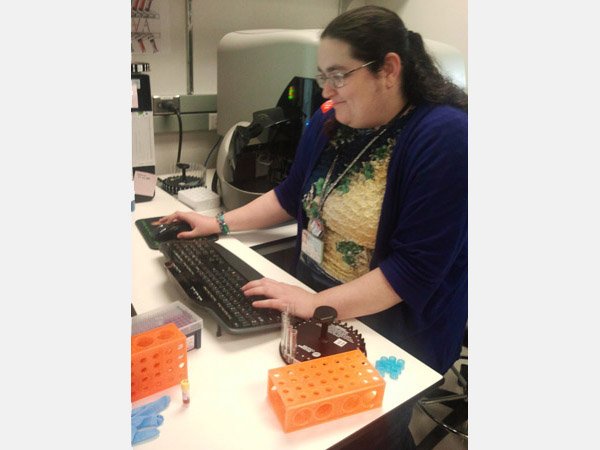 Here we are in the flow cytometry core laboratory reading samples that have been prepared the day before. We have added a red dye that binds to DNA and fluoresces when it is excited by a laser. The purpose of this is to know how much DNA is in each of the cells, which we use to determine what phase of the cell cycle they are in since we are studying cells that arrest the cell cycle. The glass tubes in the carousel contain our samples, and Angela is working on the computer to tell it what samples are in each tube, and setup the protocol for reading. The flow cytometer is behind Angela (sorry!) |
[/fusion_builder_column][fusion_builder_column type=”1_1″ background_position=”left top” background_color=”” border_size=”” border_color=”” border_style=”solid” spacing=”yes” background_image=”” background_repeat=”no-repeat” padding=”” margin_top=”0px” margin_bottom=”0px” class=”” id=”” animation_type=”” animation_speed=”0.3″ animation_direction=”left” hide_on_mobile=”no” center_content=”no” min_height=”none”] 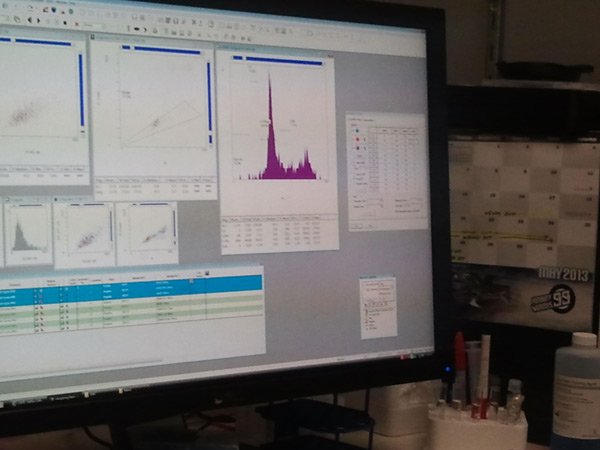 This is what the data looks like as it is being read by the flow cytometer. There are 2 peaks, and we care about how big the peaks are, especially differences between samples. The report gives us the percentage of cells with each amount of DNA (1 copy, 1.01-1.99 copies, 2 copies, >2 copies) based on the boundaries we set in the program. |
[/fusion_builder_column][/fusion_builder_row][/fusion_builder_container]